The Blueprint: How to Build a Professionally Ventilated Home Cigar Room

By the Experts at Commercial Air Purifiers | Published: October 24, 2025
Embarking on the project of building a dedicated home cigar room is a testament to a true passion. It’s an ambition to create more than just a place to smoke—it's about crafting a personal sanctuary, a controlled environment designed for relaxation and the appreciation of a fine craft. However, the success of this project hinges on one critical, often underestimated element: the air management system. A truly functional and enjoyable cigar lounge is an engineered system, not simply a well-decorated room.
As air quality engineers who have consulted on countless home lounge projects, we’ve seen the difference between a room that works and one that fails. The difference lies in a systematic, science-based approach to ventilation and purification. This is not the place for guesswork or half-measures. In this comprehensive guide, we will provide you with the exact blueprint a professional would use, walking you step-by-step through the process of designing and building a ventilated cigar room that is comfortable, clean, and—most importantly—effectively contained from the rest of your home.
Before You Begin: The Unshakeable Principles of Smoke Containment
Before a single tool is lifted, it’s crucial to understand why such a robust system is necessary. Tobacco smoke is one of the most complex and invasive indoor pollutants. The U.S. Centers for Disease Control and Prevention (CDC) has identified over 7,000 chemicals in secondhand smoke, a mixture of fine solid particles, oily tar droplets, and toxic gases. This isn't just an odor; it's a chemical aerosol that will aggressively penetrate any unprotected area of your home.
Therefore, every step of your build must serve three core engineering principles:
-
Isolation: The lounge must be treated as a sealed chamber, physically separated from the rest of your home’s shared airspace.
-
Exhaustion: You must use a powerful fan to mechanically capture and exhaust a large volume of contaminated air directly outside.
-
Purification: You must continuously filter and clean the air that remains inside the lounge to maintain a comfortable, breathable environment.
The single biggest mistake you can make is to ignore the first principle by allowing the room to be connected to your home’s central HVAC system. This will turn your furnace and air conditioner into a highly efficient smoke distribution network, contaminating your entire house and ductwork with toxic, odorous residue. The project must begin with total isolation.
Step 1: Creating a Sealed Chamber (The Foundation)
The first phase of the build is to prepare the room itself, transforming it from a standard room into a well-sealed container.
Decommissioning HVAC
Your first task is to completely disconnect the room from your central HVAC system. This means locating the supply and return air vents inside the room and sealing them off. Simply closing the louvers on the vent cover is not sufficient. For a permanent solution, the ducts should be capped with sheet metal and sealed airtight with mastic sealant behind the wall or ceiling, after which you can place a solid vent cover over the opening for a clean look.
Air Sealing the Room
Next, you must minimize air leakage. Smoke will find and exploit every tiny crack and crevice.
-
Doors: The ideal choice is a solid-core exterior door, which provides better sound and smoke insulation than a hollow-core interior door. Install full weatherstripping around the entire door frame and a high-quality door sweep with a rubber seal at the bottom.
-
Outlets and Switches: Air can easily leak through electrical boxes. Remove the cover plates and install inexpensive foam gaskets behind them to create a tighter seal.
-
Gaps and Cracks: Use a high-quality, paintable caulk to seal any gaps between the wall and the floor/ceiling trim, as well as around window frames.
Choosing Surfaces
While not strictly part of ventilation, your choice of surfaces will dramatically impact the long-term cleanliness of the room. Hard, non-porous surfaces like hardwood or tile flooring, leather furniture, and semi-gloss paint are far superior to porous materials like carpet and fabric drapes, which act as sponges for sticky thirdhand smoke residue.
Step 2: Designing for Negative Pressure and Exhaust (The Engine)
With the room sealed, you can now engineer the most critical component of the system: the exhaust. This is the engine that will pull the smoke out of the room and protect the rest of your home.
Calculating Your Air Exchange Rate (ACH)
The professional benchmark for ventilation is Air Changes per Hour (ACH). This metric defines how many times the total volume of air in your room is exhausted outside in one hour. For a room with heavy smoke production, this rate must be extremely high. Industry standards from the American Society of Heating, Refrigerating and Air-Conditioning Engineers (ASHRAE) in their Standard 62.1 call for very high ventilation rates in smoking lounges. For a home application, we recommend a firm minimum target of 15 ACH.
Sizing Your Exhaust Fan (CFM Calculation)
To hit your 15 ACH target, you must select a fan with enough power, measured in CFM (Cubic Feet per Minute). You can calculate your required CFM with this essential formula:
CFM = (Room Volume in Cubic Feet x Target ACH) / 60 minutes
Example: Let’s design a system for a 16 ft x 12 ft room with an 8 ft ceiling.
-
Calculate Room Volume: 16 ft x 12 ft x 8 ft = 1,536 Cubic Feet
-
Apply Target ACH: 1,536 cu ft x 15 ACH = 23,040 cubic feet per hour
-
Convert to CFM: 23,040 / 60 minutes = 384 CFM
You will need an exhaust fan rated for at least 384 CFM. It is always wise to select a fan that slightly exceeds your requirement.
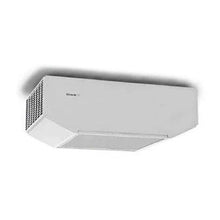
Choosing and Placing Your Fan and Vent
The best fan for this application is a quiet, powerful inline duct fan. Unlike a noisy bathroom fan, these are installed within the ductwork, which significantly reduces noise in the room. The exhaust intake grille should be installed high on an interior wall, as smoke naturally rises. This intake is then connected via smooth, rigid ductwork to the inline fan, which then vents the smoke directly to the outdoors through an exterior wall or the roof.
Step 3: Providing a Controlled Air Supply (The Lungs)
Air is a closed system. If you are exhausting 384 CFM of air out of a sealed room, you must provide a way for 384 CFM of fresh "makeup air" to come in. Without this, the fan will struggle and fail to create the proper airflow.
The most practical and effective way to provide makeup air in a residential setting is through a passive supply. By cutting a 1-inch to 1.5-inch gap at the bottom of the room’s sealed door, you create a dedicated intake path. Your powerful exhaust fan will create negative pressure, actively pulling its makeup air from the hallway through this gap. This controlled flow is what ensures air is always moving into your lounge, never out.
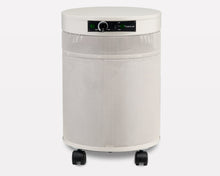
Step 4: Adding a High-Performance Air Scrubber (The Polisher)
With the exhaust system protecting the rest of your home, the final step is to add an in-room air purifier to maintain a clean and comfortable environment for you and your guests.
Why Exhaust Isn't Enough
Even with a powerful exhaust system changing the air every four minutes (15 ACH), a significant concentration of smoke remains in the room at any given moment. This is what creates the hazy, thick atmosphere during a gathering. The exhaust system is for containment; the in-room purifier is for comfort and real-time cleaning.
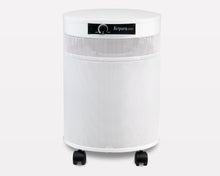
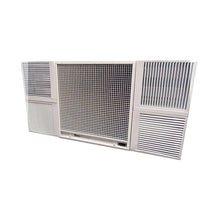
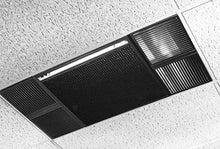
Sizing and Selecting Your Purifier
This unit, often called a smoke eater, continuously recirculates and scrubs the air inside the room. To keep up with active smoking, this unit should also be very powerful, sized to achieve 8-10 ACH. You will use the same CFM calculation to determine its required power rating.
Crucially, this purifier must have the right technology. As the U.S. Environmental Protection Agency (EPA) advises, a multi-stage approach is necessary for complex pollutants like smoke. Your unit must have:
-
A True HEPA filter to capture the fine particles and tar that make up the visible smoke.
-
A massive activated carbon filter (weighing 15 pounds or more) to adsorb the gaseous chemicals and VOCs that cause the odor.
From Blueprint to Reality: A Final Checklist
Building a properly ventilated cigar room is a systematic process. Use this checklist to guide your project planning.
-
Select & Measure: Choose your room and take precise measurements of its length, width, and height.
-
Isolate & Seal: Decommission the HVAC vents. Air seal the door, outlets, windows, and trim.
-
Calculate Exhaust: Determine your required exhaust fan CFM to achieve a minimum of 15 ACH.
-
Install Exhaust System: Select a properly sized inline duct fan and have it installed by a professional, venting directly outside.
-
Create Makeup Air Path: Ensure a 1- to 1.5-inch undercut on the room’s door.
-
Calculate Purification: Determine your required air purifier CFM to achieve 8-10 ACH.
-
Select & Place Purifier: Choose a high-performance smoke eater with both HEPA and heavy-duty carbon filtration.
The purification stage is critical. Our line of Commercial-Grade Smoke Eaters is specifically engineered with the high CFM and heavy-duty filtration needed for these demanding environments. To master the calculations, read our foundational guide: "CFM, ACH, and Negative Pressure: An Engineer's Guide."
Conclusion
Building a personal cigar lounge is an ambitious and rewarding project. By approaching it as an engineering challenge and following this systematic blueprint, you can create a space that is not only stylish and comfortable but also safe and responsible. The four pillars—Isolation, Exhaustion, Supply, and Purification—work together to create a complete air management system. This methodical approach ensures that your private sanctuary can be enjoyed for years to come without ever compromising the air quality of the rest of your home.
Planning your project? Our specialists are available for a free consultation to help you design the perfect system.
Your Technical Construction Questions Answered
Do I need to hire a professional HVAC contractor for this project?
For the installation of the exhaust fan, ductwork, and exterior vent, we highly recommend it unless you have extensive, professional-level DIY experience. An improperly installed exhaust system can lead to dangerous back-drafting, moisture problems, and building code violations. A professional will ensure it's done safely and effectively.
Can I just use a powerful window fan for my exhaust?
A window fan is a very poor substitute and is not recommended. It will not have the certified CFM power to achieve the target ACH, it cannot create effective negative pressure, and it provides a poor seal, allowing smoke to leak back into the room and the house.
What is the best location in the house for a dedicated cigar room?
Ideally, choose a room with at least one exterior wall. This dramatically simplifies the process and reduces the cost of venting your exhaust fan to the outdoors. A room in a basement or on the main floor that is somewhat isolated from the primary living areas is also a great choice.
Roughly how much will a proper ventilation and purification system cost?
While prices vary, you should budget for several key components: a high-quality inline duct fan, rigid ducting materials, the exterior vent cap, professional labor for the installation, and the high-performance in-room air purifier (smoke eater). It is a significant investment but is an absolutely essential, non-negotiable part of building a functional and safe cigar room.